

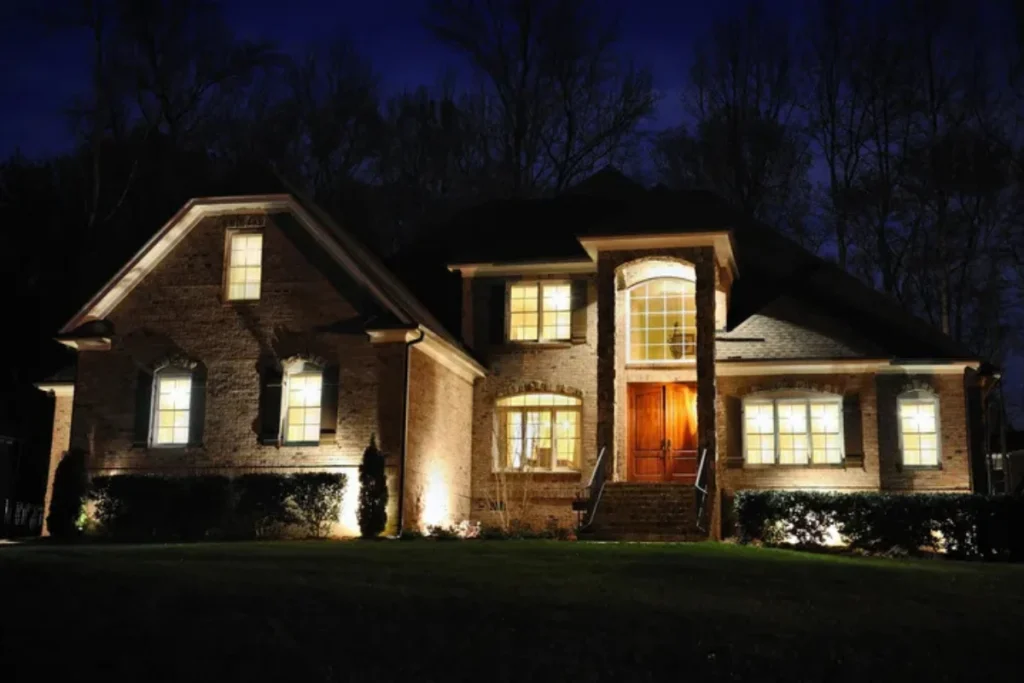
If you’ve ever looked at your home at night and felt that it disappears into the darkness, you’re not alone. Many homeowners invest in landscaping, fresh paint, and architectural details, only to realize that none of those features are visible after sunset.
That’s where exterior house uplighting can make a dramatic difference.
Instead of flooding your property with harsh light, uplighting highlights the best parts of your home. It creates depth, improves curb appeal, and makes your house look more welcoming without feeling overlit.
Whether you have a modern home, a traditional ranch, or a two-story property with stone or brick accents, the right uplighting design can completely transform the nighttime appearance of your home.
What Is Exterior House Uplighting?
Exterior house uplighting is a top lighting technique where fixtures are placed near the ground and aimed upward toward the house. The goal is to illuminate architectural features such as walls, columns, stonework, gables, and entryways.
Unlike standard floodlights that can create glare, uplights produce a softer and more intentional effect. They draw attention to specific areas rather than washing the entire house in bright light.
Common features that benefit from uplighting include:
- Front entry columns and pillars.
- Stone or brick facades.
- Garage surrounds.
- Gables and rooflines.
- Decorative trim.
- Trees and landscaping near the house.
Why Homeowners Choose Uplighting
Many homeowners initially consider outdoor lighting for security. However, they often discover that a well-designed uplighting system provides several additional benefits.
Enhanced curb appeal
A professionally lit home stands out at night. Uplighting adds dimension and makes architectural details more noticeable.
Improved safety
Illuminating entryways, walkways, and dark corners helps guests move around more safely after dark.
Added security
Strategic lighting reduces shadowy areas around the home and can make the property less appealing to intruders.
Increased property value
Outdoor lighting is often viewed as a premium home feature. A tasteful uplighting design can contribute to a more polished and higher-end appearance.
Start with the Architecture
The biggest mistake homeowners make is placing lights before creating a lighting plan.
Before installing any fixtures, walk around your home at night and identify the features you want people to notice first.
Ask yourself:
- What is the focal point of the front elevation?
- Are there stone, brick, or wood textures worth highlighting?
- Do you want the entryway to stand out?
- Are there tall gables or columns that add character?
By prioritizing these elements, you can create a layered lighting design instead of simply adding lights everywhere.
Choose the Right Beam Angle
Not all uplights create the same effect.
Narrow beam (15°–25°)
Best for:
- Columns.
- Small trees.
- Stone accents.
Medium beam (30°–45°)
Best for:
- Entryways.
- Single-story walls.
- Decorative trim.
Wide beam (60°+)
Best for:
- Large facades.
- Two-story walls.
- Broad architectural surfaces.
Using a mix of beam angles creates a more natural and professional-looking result.
Determine Proper Fixture Placement
Placement has a huge impact on how the new lighting looks.
For walls and facades
Position fixtures about 12–24 inches from the wall. This allows the light to spread evenly without creating an overly bright hotspot.
For columns
Place the fixture 6–12 inches from the base and aim it directly upward.
For stone or textured surfaces
Move the fixture slightly farther away so the light grazes the surface. This emphasizes texture and creates attractive shadows.
For tall gables
Use fixtures with higher output and place them farther from the wall to achieve full vertical coverage.
Avoid the “Runway” Effect
A common DIY mistake is installing evenly spaced lights across the entire front of the house.
This often creates a repetitive pattern that looks unnatural.
Instead, vary the spacing based on architectural features. Place lights where they serve a purpose, not simply where there is empty wall space.
For example:
- One uplight on each entry column.
- Two lights highlighting a large stone section.
- One wider beam covering the garage surround.
- Accent lights for nearby trees.
This approach creates balance without making the house look overlit.
Select the Right Color Temperature
Color temperature significantly affects the mood of your lighting.
2700K
Creates a warm, inviting glow that works well with brick, stone, and traditional homes.
3000K
A popular choice for most residential properties. It provides warmth while still looking crisp and modern.
4000K+
Appears cooler and brighter. Often better suited for contemporary homes, but it can feel less welcoming if overused.
For most homes, 3000K exterior house uplighting provides the best balance between elegance and visibility.
Layer Uplighting with Landscape Lighting
The best outdoor lighting designs don’t focus only on the house.
Consider adding:
- Path lights along walkways.
- Tree uplights.
- Downlights from eaves.
- Accent lighting for garden beds.
Layering different types of lighting creates depth and prevents the home from looking isolated against a dark yard.
Think of the house and landscaping as one connected nighttime scene.
Consider Energy Efficiency
Modern LED uplights consume far less electricity than older halogen fixtures.
Benefits of LED exterior house uplighting include:
- Lower energy costs.
- Longer lifespan.
- Reduced maintenance.
- Consistent color output.
- Less heat generation.
Many homeowners also choose smart controls or timers so the lights automatically turn on at dusk and off later in the evening.
Design Tips for Different Home Styles
Traditional homes
- Use warm white lighting.
- Highlight columns and entryways.
- Accent brick or stone textures.
Modern homes
- Use cleaner, wider beams.
- Focus on geometric lines.
- Avoid excessive fixture counts.
Craftsman homes
- Highlight tapered columns.
- Use warm lighting around wood details.
- Accent roofline features.
Stone or brick homes
- Use grazing techniques.
- Position fixtures slightly farther from the wall.
- Emphasize texture and depth.
Common Uplighting Mistakes to Avoid
- Using fixtures that are too bright: More light does not always create a better effect.
- Placing lights directly against the wall: This can create harsh hotspots.
- Mixing different color temperatures: Consistency is important for a professional appearance.
- Ignoring glare: Fixtures should be aimed so the light source is not visible from the street.
- Lighting every surface equally: Contrast is what creates visual interest.
Frequently Asked Questions
1. How many uplights do I need for the front of my house?
The number depends on the size of the home and the architectural features you want to highlight. Most average-sized homes use between four and eight strategically placed uplights rather than lighting every section of the facade.
2. What is the best color temperature for exterior house uplighting?
For most residential homes, 3000K provides a warm and inviting appearance while still offering excellent visibility.
3. Should uplights be visible during the day?
Ideally, the fixtures should be discreet and blend into the landscaping or foundation area so the focus remains on the home itself.
4. Can uplighting improve home security?
Yes. By reducing dark areas around entryways, corners, and landscaping, uplighting can improve visibility and make the property feel more secure.
5. Is LED uplighting better than halogen?
In most cases, yes. LED fixtures use less energy, last longer, require less maintenance, and maintain a more consistent light color over time.
6. How far should an uplight be from the wall?
For most applications, placing the fixture 12–24 inches away from the wall creates an even wash of light without harsh hotspots.
7. Can I install exterior house uplighting myself?
Some homeowners choose to install low-voltage systems themselves. However, professional installation often produces better fixture placement, wiring protection, and overall lighting balance.
8. Will uplighting increase my electric bill significantly?
Modern LED systems are highly energy efficient. A typical residential uplighting setup usually adds only a modest amount to monthly electricity costs.
9. What architectural features should I prioritize?
Start with the front entry, columns, stone or brick accents, and prominent gables. These areas typically create the greatest visual impact.
10. Can uplighting be combined with permanent holiday lighting?
Yes. Many homeowners integrate architectural uplighting with permanent lighting systems so the home can have both everyday accent lighting and customizable holiday lighting throughout the year.
Final Words
A well-planned exterior house uplighting design does much more than make your home brighter. It highlights the character of your architecture, improves safety, adds curb appeal, and creates a welcoming atmosphere every evening.
The key is to focus on balance rather than brightness. By selecting the right beam angles, placing fixtures strategically, and using consistent color temperatures, you can achieve a professional-looking result that enhances your home without overwhelming it.
If you’re considering outdoor lighting for your property, start by identifying the features that make your home unique. Those architectural details are often the perfect foundation for an uplighting design that looks elegant, functional, and timeless.